
You wake up, look at your lawn, and spot large bare patches staring back at you. It feels frustrating. You watered it, mowed it, and still, dead grass and bald spots keep showing up. You are not alone. Millions of American homeowners deal with bare spots in their lawns every single year.
The good news? You can fix it. This guide shows you exactly how to fix large bare spots in your lawn- step by step. You will learn the real causes of lawn damage, the right soil preparation methods, the best grass seed selection tips, and how to keep your lawn repair results lasting long-term.
Let’s get your lawn looking full and green again.
What Causes Large Bare Spots in a Lawn?
Bare spots don’t appear randomly. Something always causes them. According to the University of California Cooperative Extension, most lawn damage links back to these common causes:
- Heavy Foot Traffic: Repeated walking compacts the soil and cuts off oxygen and nutrients to the grass roots
- Pet Urine Damage: High nitrogen levels in dog urine burn grass blades and create dead brown patches
- Grubs or Insects: Lawn grubs and sod webworms chew through grass roots and kill turf fast
- Fungal Disease: Brown patch and dollar spot spread quickly in humid conditions and create irregular dead zones
- Poor Soil Quality: Compacted or nutrient-depleted soil blocks healthy root development and stops grass from growing
- Chemical or Fertilizer Burn: Over-applying fertilizer or herbicide burns grass blades and damages the soil underneath
Identifying your cause first saves you time and effort. Now, let’s gather what you need to start the repair.
What You Need Before You Start
Gathering everything before you begin saves you multiple trips and keeps the job moving. Here is exactly what you need to fix large bare spots in your lawn:
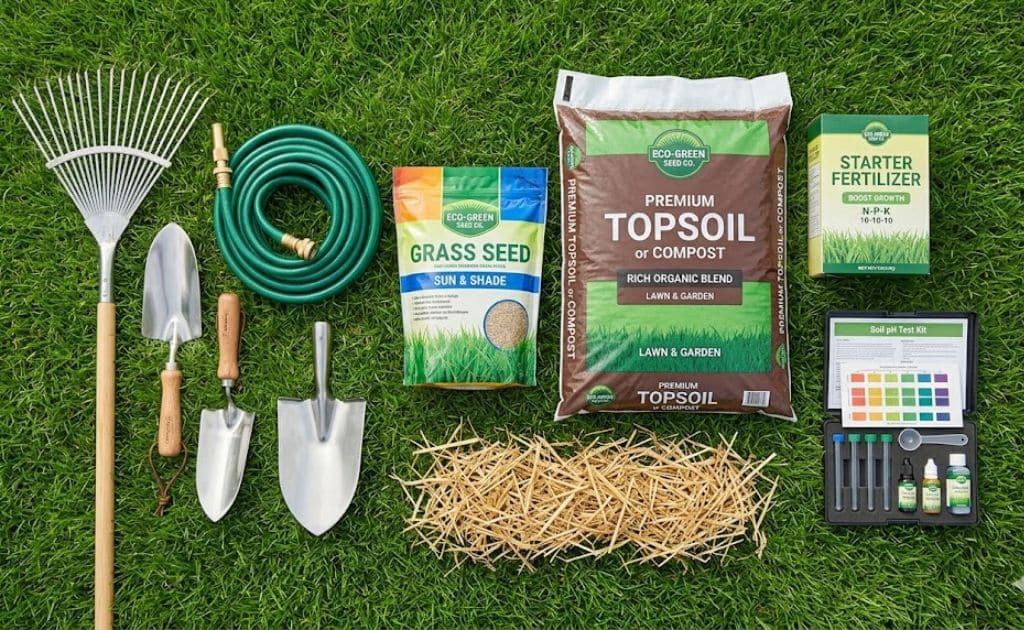
Tools Required
- Garden rake- loosens and levels the soil surface
- Hand trowel or spade- removes dead grass and debris
- Lawn roller- firms the seed-to-soil contact after seeding
- Garden hose or sprinkler- delivers consistent moisture to the seeded area
- Soil tamper- compresses topsoil evenly before seeding
Materials Required
- Grass seed- matched to your region and grass type
- Topsoil or compost- improves soil quality and fills deep bare patches
- Starter fertilizer- supports fast seed germination and root development
- Straw mulch or erosion mat- protects seeds from wind and birds
- Soil pH test kit- checks soil health before you seed
You now have everything ready. Let’s walk through exactly how to fix large bare spots in your lawn step by step.
How to Fix Large Bare Spots in Lawn- Step by Step
Follow these steps carefully. Skipping any step can slow down grass growth and leave you with weak, patchy results.
Step 1- Identify and Remove the Dead Grass
Start by clearing the bare area completely. Use a hand trowel or spade to cut around the edges of the dead grass patch. Pull out all dead turf, roots, and debris from the area. Remove everything down to the bare soil. Do not leave any dead material behind. Dead grass blocks seed-to-soil contact and slows germination. Work the area until you see clean, exposed soil surface ready for repair.
Step 2- Loosen and Prepare the Soil
Hard, compacted soil stops grass seed from taking root. Use a garden rake or hand trowel to break up the top 2 to 3 inches of soil. Break apart any large soil clumps you find. Loosen the entire bare patch evenly, including the edges. This step improves water absorption, root penetration, and air circulation- all critical for healthy grass growth.
Step 3- Amend the Soil with Topsoil or Compost
Thin or nutrient-poor soil cannot support strong grass root development. Spread a 1 to 2 inch layer of fresh topsoil or compost over the loosened soil. Mix it into the existing soil using your rake. This improves soil structure, raises nutrient levels, and creates the ideal growing environment for new grass. Check your soil pH using a test kit. Most grass types grow best in a pH range of 6.0 to 7.0.
Step 4- Choose the Right Grass Seed for Your Region
Picking the wrong grass seed wastes your effort completely. Match your seed to your climate zone and existing lawn grass type. Use cool-season grasses like Kentucky bluegrass, tall fescue, or perennial ryegrass in northern regions. Use warm-season grasses like Bermuda grass, Zoysia, or St. Augustine in southern regions. Always buy a high-quality grass seed with a strong germination rate listed on the label.
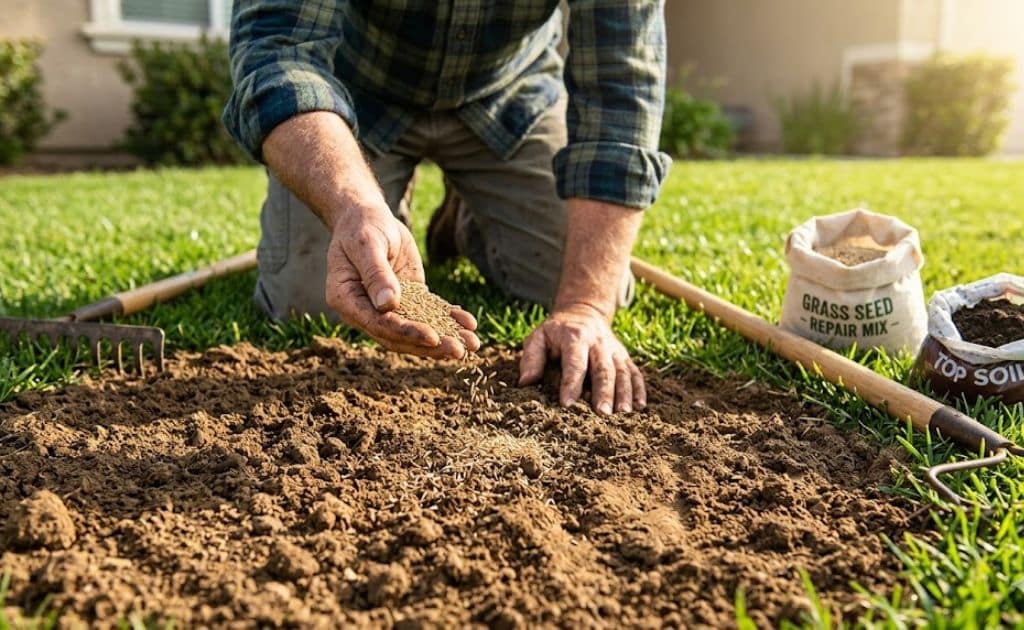
Step 5- Spread the Seed Evenly
Pour your grass seed into a hand spreader or spread it by hand for small bare spots. Apply the seed at the rate listed on the seed packaging. Spread the seed evenly across the entire bare area. Overlap slightly onto the healthy surrounding grass to blend the repair area naturally. After spreading, use your rake lightly to press the seed into the soil surface. Good seed-to-soil contact is the single most important factor in successful germination.
Step 6- Water the Area Properly
Watering correctly makes or breaks your lawn repair. Water the seeded area immediately after seeding. Keep the top inch of soil moist at all times during germination. Water lightly two to three times daily instead of one heavy soak. Heavy watering washes grass seed away and creates uneven patches. Continue this watering schedule for 2 to 3 weeks until you see consistent new grass growth across the entire repaired area.
Step 7- Protect the Seeded Area
New grass seed needs protection to germinate successfully. Spread a thin layer of straw mulch or place an erosion mat over the seeded area. This layer locks in moisture, regulates soil temperature, and shields seeds from birds and wind. Keep all foot traffic off the repaired lawn area completely. Put up a simple barrier or lawn flag markers if needed. Stay off the area until the new grass reaches at least 3 inches tall.
Your bare lawn patches now have everything they need to fill in strongly. Next, let’s look at how you can speed up that grass growth even further.
How to Get Grass to Grow in Bare Spots Faster
You did the repair work. Now speed up the results. These three steps accelerate new grass growth and strengthen it.
Use a Starter Fertilizer
Apply a starter fertilizer right after seeding. Starter fertilizers are high in phosphorus, which promotes strong early root development. Follow the label rate- never over-apply. This one step can cut your germination time by several days.
Keep Soil Consistently Moist
Dry soil kills grass seed before it ever sprouts. Water the bare spot lightly two to three times daily. Never let the soil surface dry out completely during the first three weeks. Consistent moisture is the fastest way to grow grass in bare spots.
Avoid Foot Traffic Until Established
Foot traffic crushes young grass seedlings before they anchor into the soil. Stay completely off the repaired area until the new grass reaches 3 inches tall. Even light pressure disrupts root establishment and creates new bare patches.
Stay consistent with these three habits, and your lawn repair will fill in faster than you expect. Next, let’s talk about the best time of year to get the strongest results.
Best Time to Repair Bare Spots in Your Lawn
Timing your lawn repair correctly makes a huge difference. Grass seed germinates best when soil temperature and weather conditions align with your grass type.
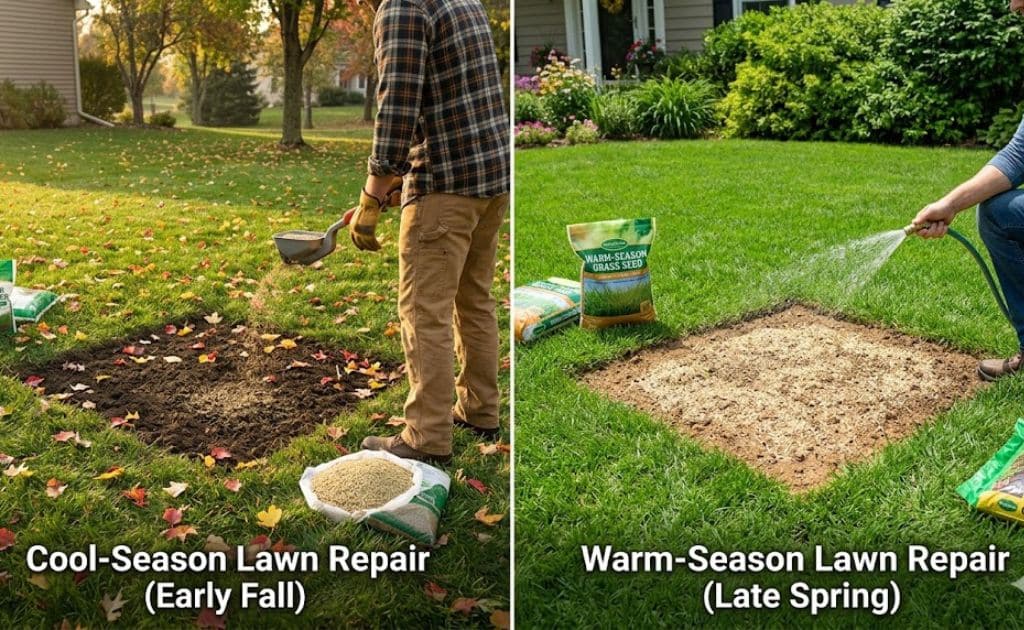
Cool-Season Grasses
The best repair time is early fall (late August to October). Soil temperatures sit between 50°F and 65°F- perfect for Kentucky bluegrass, tall fescue, and perennial ryegrass to germinate. Early spring works too, but fall produces stronger results.
Warm-Season Grasses
The best repair time is late spring (April to June). Soil temperatures reach 65°F to 70°F- ideal for Bermuda grass, Zoysia, and St. Augustine to establish quickly. Avoid repairing in summer heat or winter dormancy.
Quick Reference:
| Grass Type | Best Repair Window | Ideal Soil Temp |
| Cool-Season | Late August- October | 50°F- 65°F |
| Warm-Season | April- June | 65°F- 70°F |
Repair at the right time, and your bare lawn patches fill in faster with less effort.
How to Prevent Bare Spots From Coming Back
Fixing bare spots takes effort. These three habits stop them from returning every season.
Improve Drainage
- Aerate your lawn every fall to break up compacted soil
- Add compost topdressing to improve water infiltration
- Fix low spots where standing water collects after rain
Manage Foot Traffic
- Install stepping stones or mulched pathways in high-traffic areas
- Rotate play and activity zones regularly across your yard
- Keep pets away from vulnerable turf areas consistently
Regular Overseeding and Fertilization
- Overseed your lawn every fall to maintain strong turf density
- Apply a balanced fertilizer every spring and fall
- Dense, well-fed grass naturally resists disease, weeds, and bare patches
Stay consistent with these habits, and bare spots won’t keep coming back.
Conclusion
Fixing large bare spots in your lawn is completely doable when you follow the right steps. Clear the dead grass, prepare the soil, choose the correct seed, and water consistently. Timing your repair and staying off the area gives your new grass the best chance to grow thick and strong.
Pick up your tools this weekend and take the first step. Your lawn can look full, green, and healthy again- faster than you think.
